
티스토리 뷰

백엔드의 ASP.NET Core API와 프론트엔드의 React를 VisualStudio Code 및 CLI를 사용하여 프로젝트를 생성하고 설정 및 실행하는 방법을 알아보겠습니다.
VisualStudio에서 프로젝트를 생성하는 방법은 아래 글을 참고하세요.
ASP.NET Core(닷넷 코어) + React(리액트) Visual Studio(비주얼 스튜디오) 프로젝트 생성
백엔드의 ASP.NET Core API와 프론트엔드의 React를 VisualStudio에서 프로젝트를 생성하고 설정 및 실행하는 방법을 알아보겠습니다. 이 글은 Windows10 및 VisualStudio 2022 Community 기준으로 작성되었습니..
bundw.tistory.com
이 글은 Windows10 및 VisualStudio Code 1.69.2 기준으로 작성되었습니다.
요구사항
- Visual Studio Code 및 C# Extention
- Node.js 및 npm
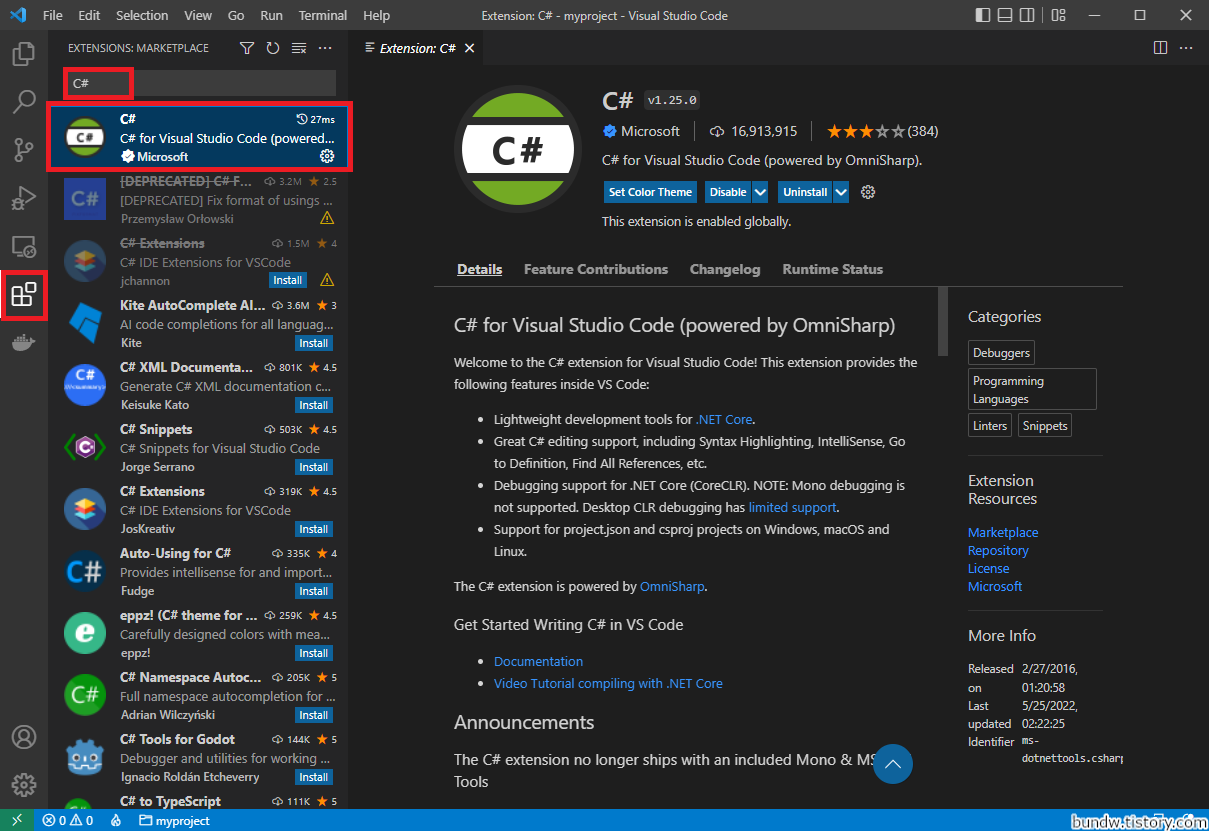
VSCode Extention에 C#이 추가되어있지 않다면, C#키워드로 검색해서 설치합니다.
프로젝트 생성
명령 프롬프트에서 다음의 명령을 입력합니다.
> dotnet new react -o myproject

"ASP.NET Core with React.js" 템플릿이 성공적으로 생성되었습니다.

생성 후 작업 처리 중...
D:\test\myproject\myproject.csproj에서 'dotnet restore' 실행 중 ...
  복원할 프로젝트를 확인하는 중...
  D:\test\myproject\myproject.csproj을(를) 155 ms 동안 복원했습니다.
복원에 성공했습니다.
myproject는 프로젝트 이름으로, 적절히 변경합니다.
프로젝트가 생성되면, 생성된 폴더 하위의 ClientApp으로 이동하여 npm install 설치를 합니다.
> cd myproject

myproject> cd ClientApp

myproject\ClientApp> npm install

npm WARN read-shrinkwrap This version of npm is compatible with lockfileVersion@1, but package-lock.json was generated for lockfileVersion@2. I'll try to do my best with it!
...
added 1945 packages from 935 contributors and audited 1971 packages in 68.806s

154 packages are looking for funding
  run `npm fund` for details

found 53 vulnerabilities (2 low, 14 moderate, 19 high, 18 critical)
  run `npm audit fix` to fix them, or `npm audit` for details
ClientApp이 React의 루트 폴더입니다.
실행
이제 VSCode를 실행하고 프로젝트 폴더를 엽니다.
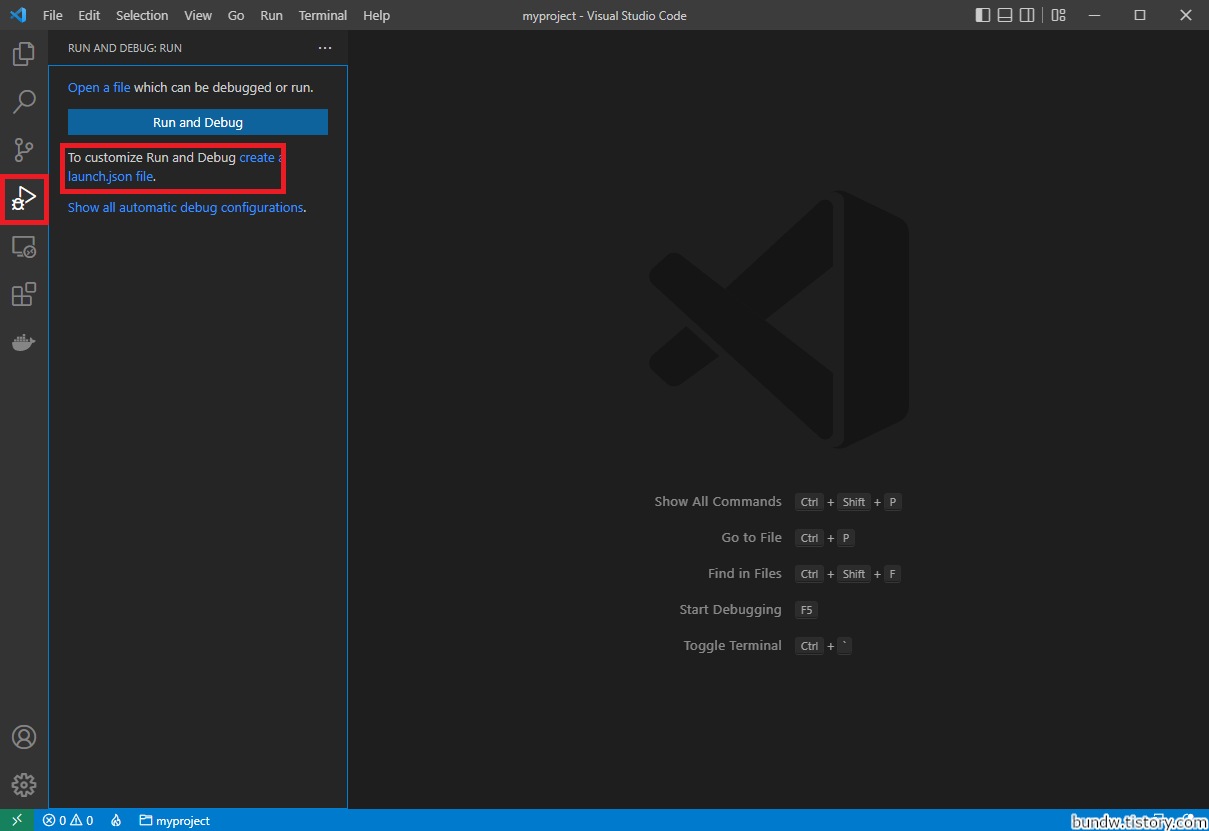
좌측의 Run and Debug 아이콘을 클릭하고(또는 Ctrl+Shfit+D키), 좌측 메뉴의 create launch.json file의 파란 글씨의 링크를 클릭합니다.
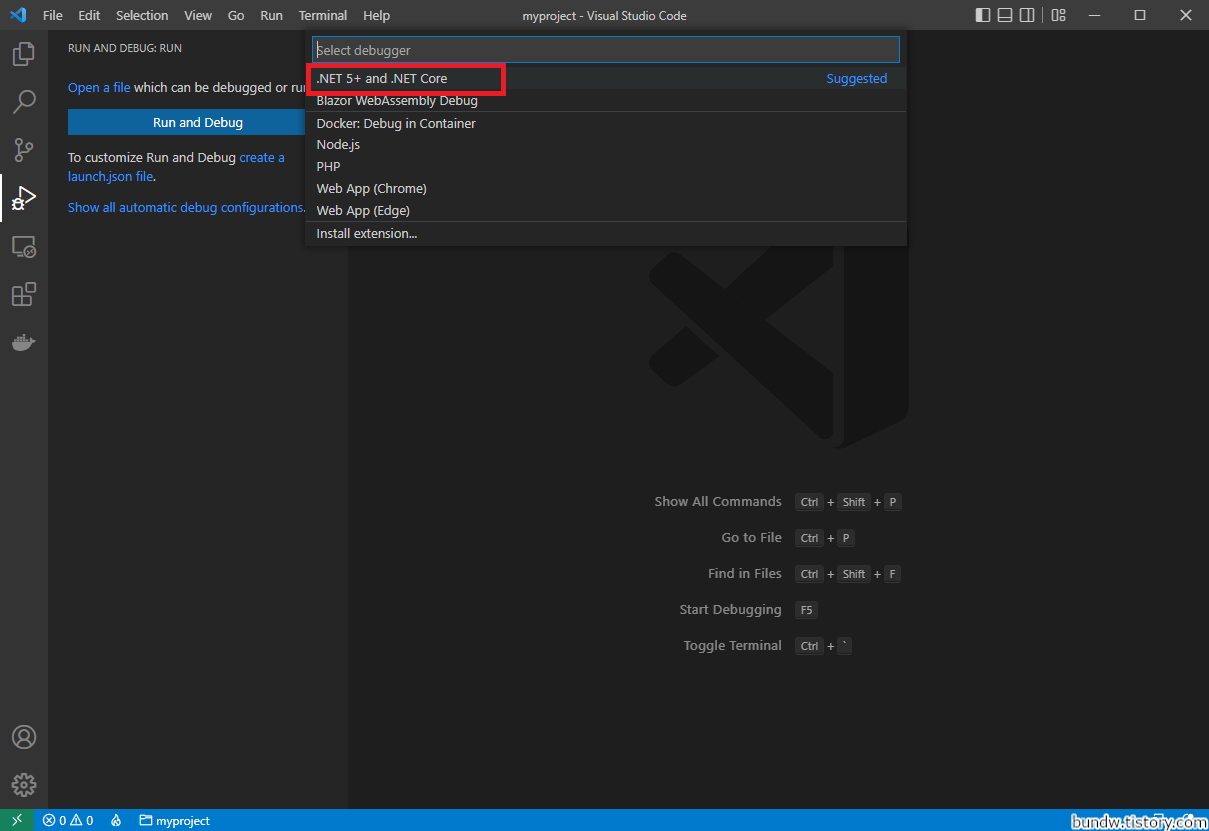
Select debugger에 .NET 5+ and .NET Core을 클릭합니다.
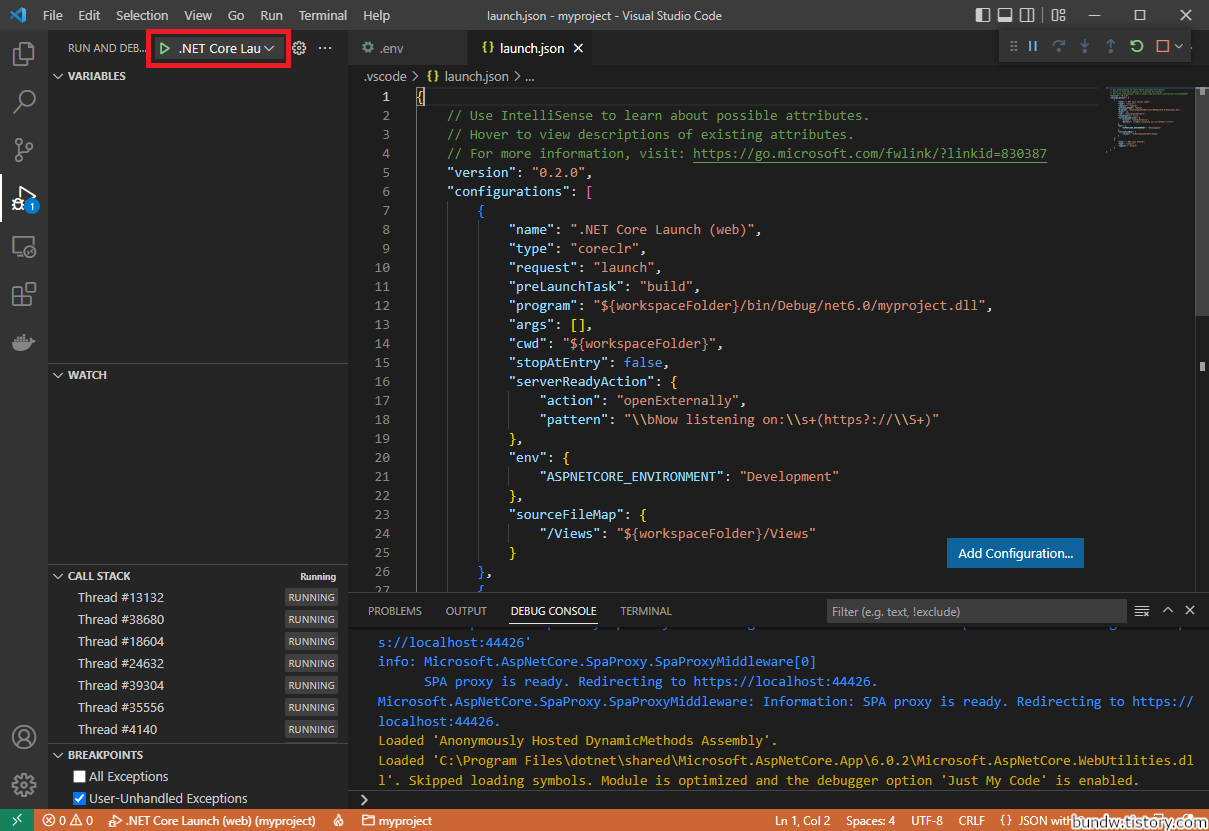
launch.json 파일이 생성되면, 좌측 메뉴의 Debug를 클릭(또는 F5키)하여 실행합니다.
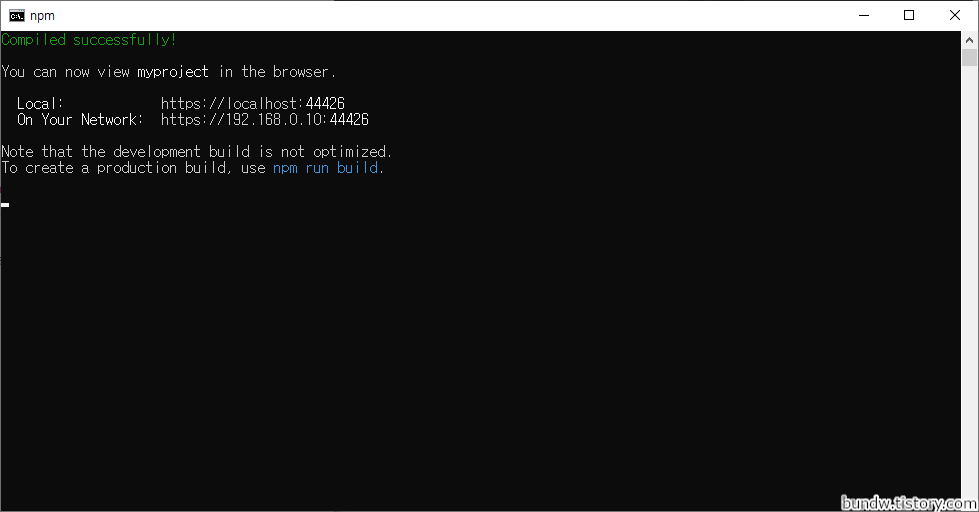
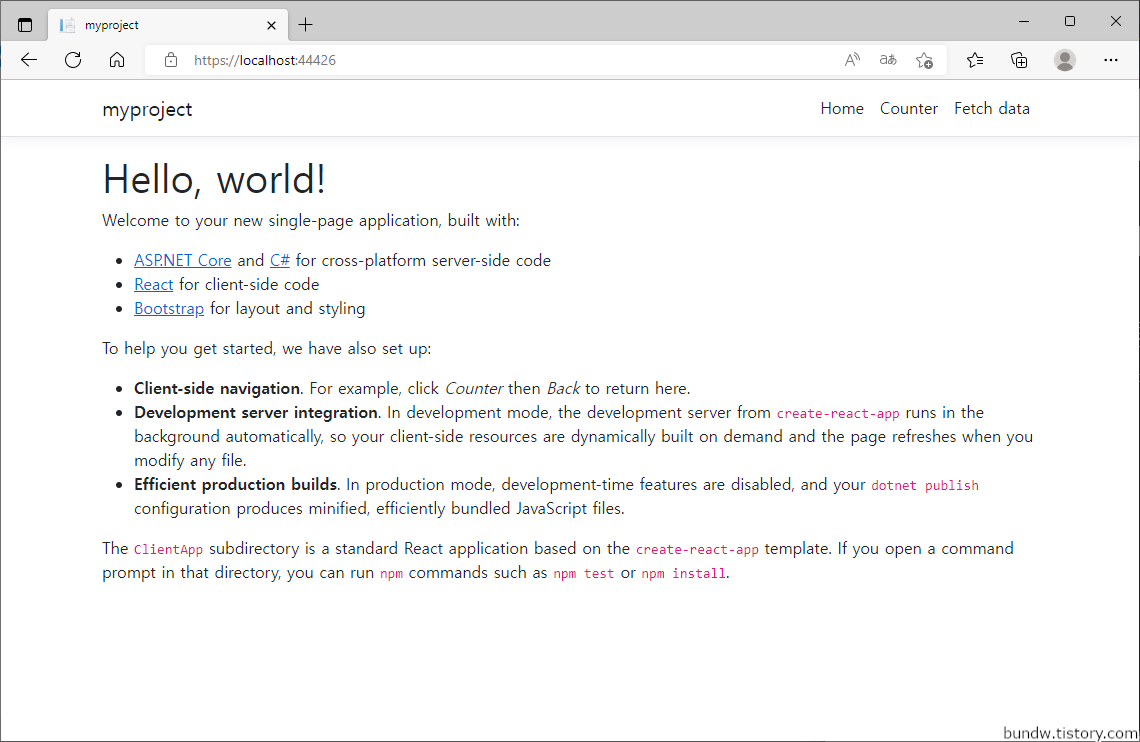
위와 같이 명령프롬프트와 웹 브라우저가 뜰 것입니다.
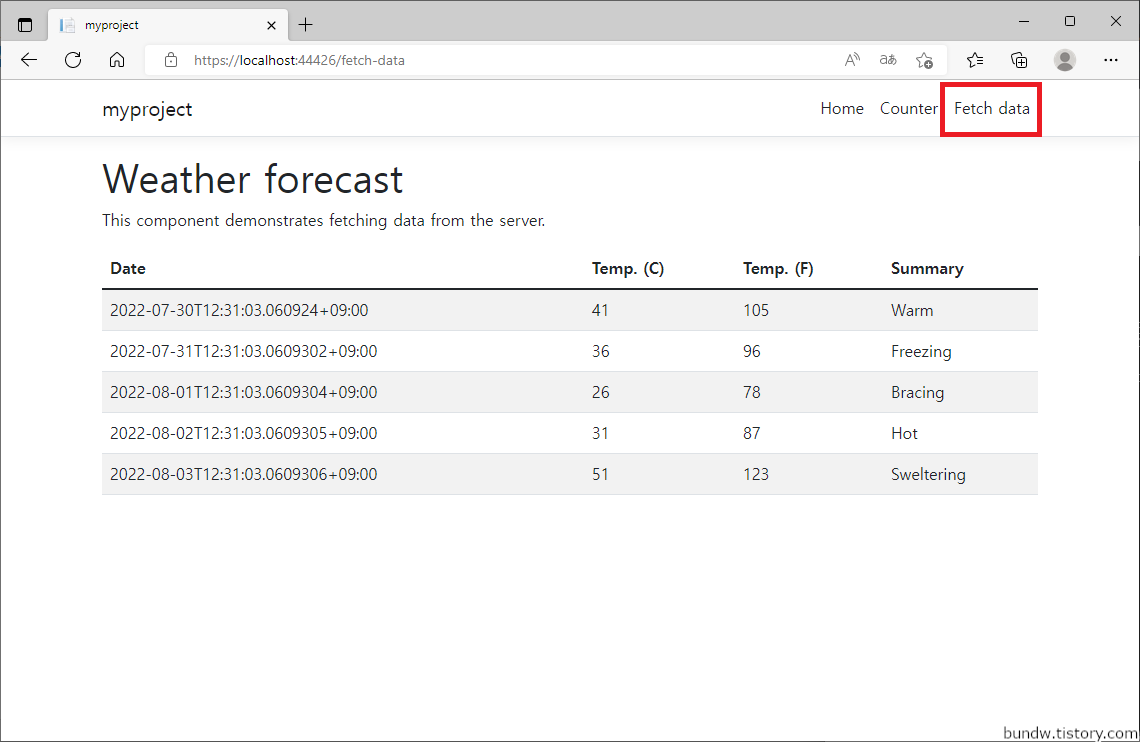
브라우저 상단의 Fetch data 메뉴를 클릭하여 ASP.NET와 React가 서로 연동이 잘 되는지 확인합니다.
참고
VisualStudio Code의 Debug(실행)를 사용하지 않고 CLI를 통해서 실행하고자 할 경우에는 React와 .NET을 각각 직접 실행시켜주어야 합니다.
먼저 .NET인 경우, 프로젝트 루트에서 다음과 같이 실행합니다.
myproject> dotnet run
info: Microsoft.Hosting.Lifetime[14]
      Now listening on: https://localhost:7093
info: Microsoft.Hosting.Lifetime[14]
      Now listening on: http://localhost:5096
info: Microsoft.Hosting.Lifetime[0]
      Application started. Press Ctrl+C to shut down.
...
React인 경우, 하위의 ClientApp 위치로 이동 후 다음과 같이 실행합니다.
myproject\ClientApp> npm start

...

Compiled successfully!

You can now view myproject in the browser.

  Local:            https://localhost:44412
  On Your Network:  https://192.168.0.10:44412

Note that the development build is not optimized.
To create a production build, use npm run build.

webpack compiled successfully
그리고 브라우저에서, npm start로 실행한 후의 표시된 주소를 입력하고 이동해서 결과를 확인합니다.
모두 완료되었습니다.
'SW개발 > Web' 카테고리의 다른 글
| PHP Laravel(라라벨)+Next.js(React/리액트) CLI 프로젝트 생성 (0) | 2022.08.04 |
|---|---|
| Ubuntu(우분투) 22.04LTS에서 .NET(닷넷) SDK 및 ASP.NET Core 설치 (0) | 2022.07.29 |
| ASP.NET Core(닷넷 코어) + React(리액트) Visual Studio(비주얼 스튜디오) 프로젝트 생성 (0) | 2022.07.28 |
| Ubuntu(우분투) 22.04LTS Composer(컴포저) 설치 (0) | 2022.07.25 |
| nginx - 413 Request Entity Too Large 에러 오류 해결 (0) | 2021.10.29 |